
If you’ve ever thought homemade butter sounds complicated, think again! With a food processor, you can whip up fresh, creamy butter in just minutes. No fancy techniques, Kitchenaid mixer or muscle power required—just a few simple steps to delicious homemade butter. This recipe allows you to easily make homemade butter using a food processor in minutes.
Whether you’re looking to eliminate processed ingredients or just make more from scratch, making butter at home has never been easier. Let’s dive in!
As an Amazon Associate, I earn from qualifying purchases.
Why Use a Food Processor?
- Effortless: Let the machine do all the work—no hand whipping required.
- Fast: Butter is ready in about 5 minutes!
- Consistent Results: The food processor creates smooth, creamy butter every time.
Ingredients
- 2 cups heavy cream (organic, high-fat cream is ideal for the best flavor)
- Salt (optional, to taste)
Tools You’ll Need
- Food processor
- (Optional) Fine-mesh strainer or cheesecloth
- Bowl of ice water
- Spatula
Need a link?
- White 9 cup Cuisinart food processor
- Spread the love butter dish
- Air tight glass containers 8 pack
- Ninja food processor slicer and dough
- Porcelain butter keeper crock
- Wood handle dough cutter
- Pink Cuisinart food processor
- Glass butter keeper with wood lid
- Fluted ceramic butter dish with lid
- Stainless steel dough cutter with measuring
- 3 cup food processor
- Black handle stainless steel dough cutter
- Scallop butter keeper crock
- 10 cup food processor

Step-by-Step Instructions
1. Add the Cream
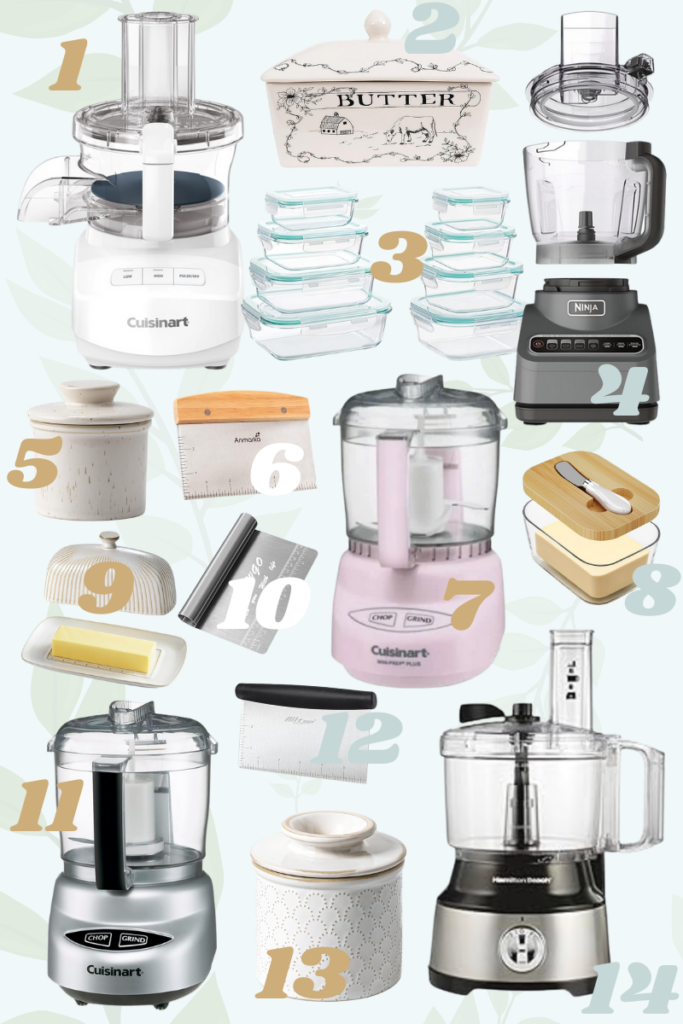
Pour 2 cups of heavy cream into your food processor. Secure the lid and get ready to see magic happen!
2. Process the Cream
Start the food processor and let it run continuously. In just a couple of minutes, you’ll see the cream transform:
- First, it thickens into whipped cream.
- Keep going, and it’ll separate into butter and buttermilk.
This entire process takes around 3–5 minutes.
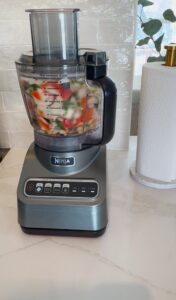
3. Separate the Butter
Once the butter solids have separated from the buttermilk, turn off the food processor. Pour the contents into a fine-mesh strainer or cheesecloth to drain the buttermilk. Save that buttermilk for pancakes, biscuits, or baking—it’s liquid gold!
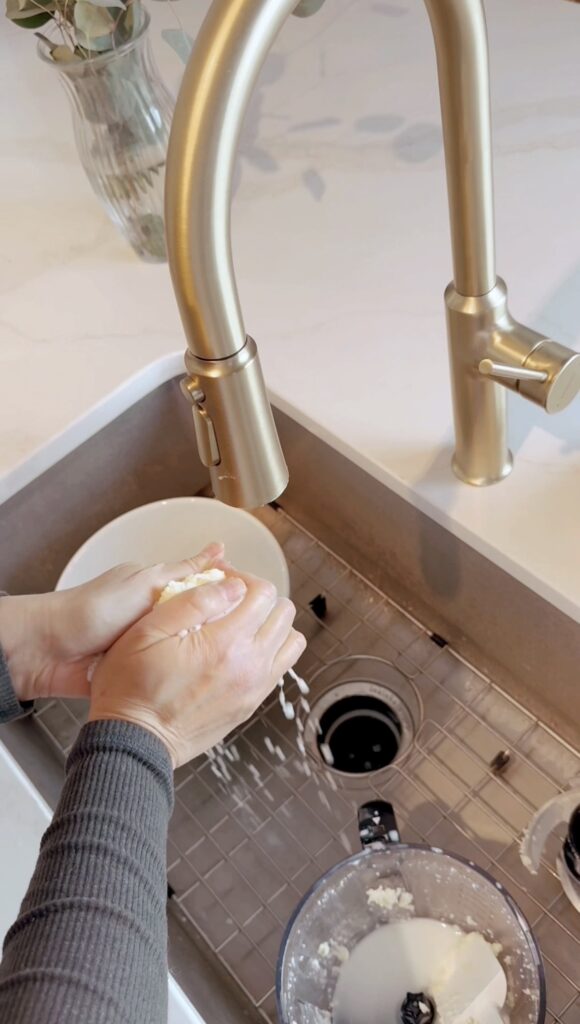
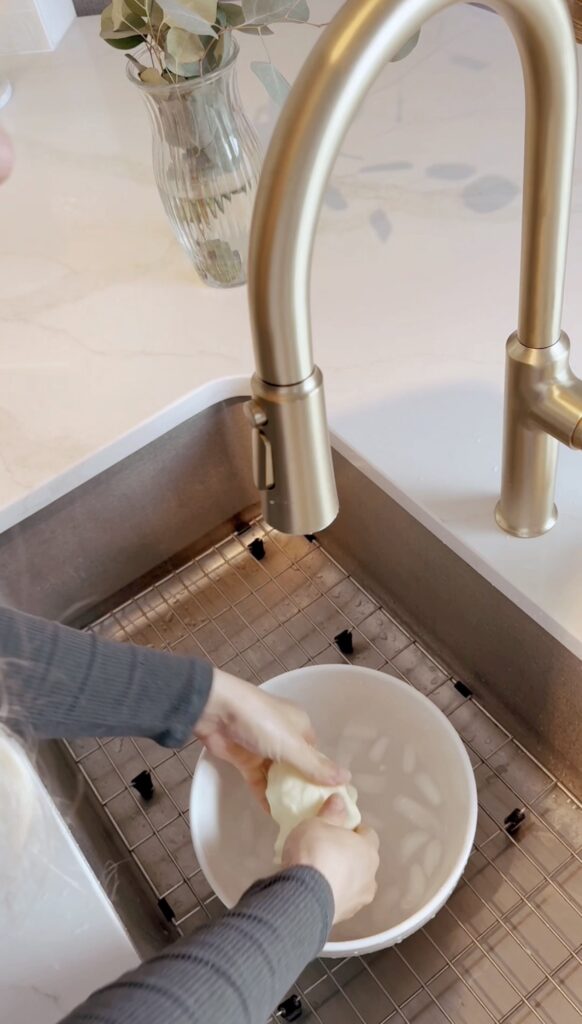
4. Rinse the Butter
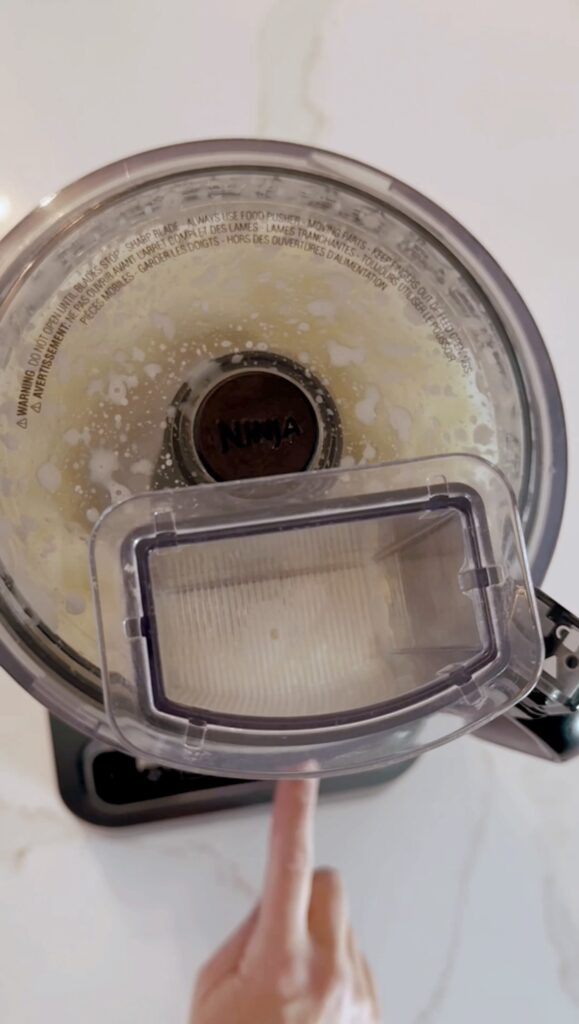
Place the butter solids into a bowl of ice water. Gently knead the butter with your hands or a spatula to remove any remaining buttermilk. Rinse and repeat until the water runs clear. This step helps extend the butter’s shelf life.
5. Add Salt or Flavorings
If you like salted butter, now’s the time to mix in a pinch of salt. Want something special? Try adding garlic, herbs, or honey for a gourmet twist.
6. Shape and Store
Shape your butter into a ball, stick, or press it into a mold. Store it in an airtight container in the refrigerator for up to a week or freeze it for longer storage.


Why You’ll Love This Method
- Minimal Effort: The food processor takes care of the heavy lifting, so you can sit back and watch the transformation.
- Versatile: Customize your butter with herbs, spices, or sweeteners.
- Fresh & Flavorful: Nothing beats the taste of homemade butter made with fresh ingredients.
Flavor Ideas to Try
- Garlic Herb Butter: Mix in minced garlic and chopped fresh herbs for a savory spread.
- Honey Butter: Stir in a tablespoon of honey for a sweet, creamy addition to breakfast.
- Cinnamon Sugar Butter: Perfect for toast or muffins—combine cinnamon and a touch of sugar.
Making homemade butter using a food processor is quick, easy, and a little bit magical. With just one ingredient and a few minutes, you’ll have fresh butter that’s perfect for spreading, baking, or gifting. Try it out and share your creations with me on Instagram. Happy butter-making!